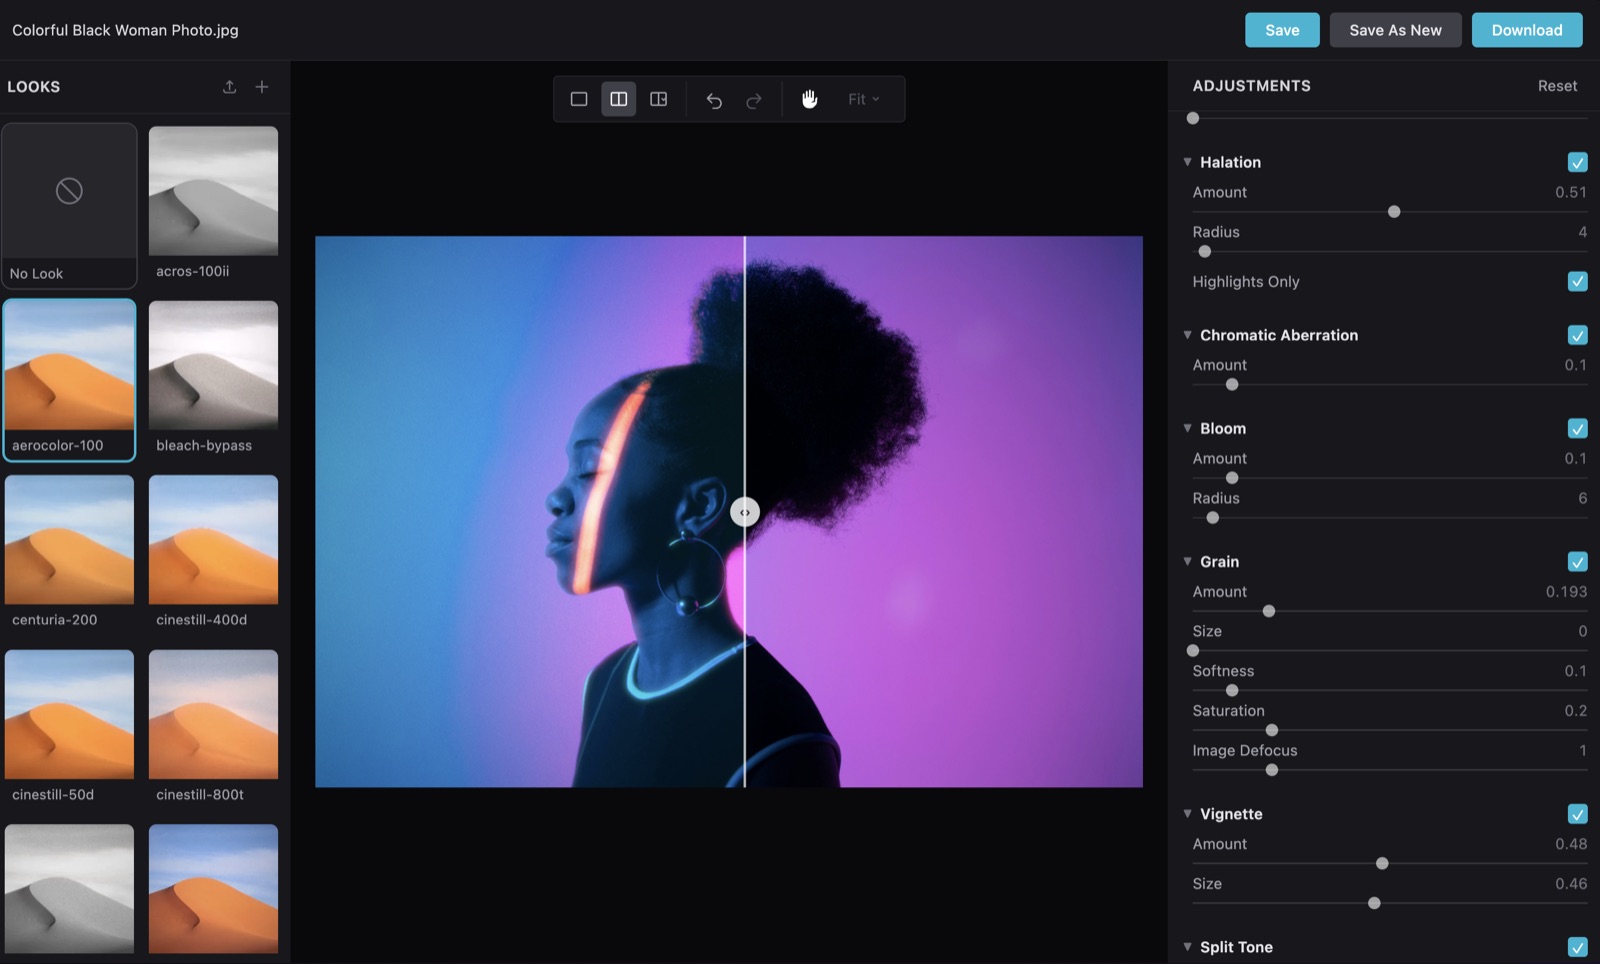
Browser UI
The hance browser-based editor previews looks in real-time on your footage, rendering effects on the GPU via WebGPU. This page documents every panel and feature.
Launching
Section titled “Launching”hance ui # open http://localhost:4800 in your browserhance ui path/to/video.mp4 # launch with a file preloadedhance ui --port 5000 # use a custom porthance ui --no-open # start the server without opening a browserUsing an AI agent? The /hance ui skill command opens the editor too: /hance ui my-video.mp4.
On macOS, this same editor is also available as a native Desktop App (currently in beta), with a native file picker, application menu, and a recents screen.
Upload & preview
Section titled “Upload & preview”Drag and drop a video or image into the editor, or pass a file path when launching. The preview updates in real-time as you adjust parameters.
The preview is rendered at a reduced resolution for smooth, real-time interaction. It does not limit the quality of what you export:
- Images preview at up to 1920×1080 (1080p), preserving aspect ratio. Export re-renders at the full source resolution (see Export).
- Videos play back through the browser’s native player. Formats the browser cannot decode, notably ProRes, are transcoded to an H.264 proxy capped at 720p / 30fps purely for preview. Playback begins within about a second and the rest of the clip streams in while transcoding continues. Seeking is limited to the portion loaded so far until the transcode finishes, after which the whole clip is seekable. The proxy is never used for export; exporting always re-renders from your original file.
Clearing the preview cache
Section titled “Clearing the preview cache”To avoid re-transcoding the same footage, hance caches each H.264 preview proxy on disk, keyed by the file’s name, size, and modified time. Re-uploading the same file is detected from that metadata alone, so it loads instantly from the cache with no re-upload or transcode. The cache is never cleared automatically, so it can grow over time. When it passes 5 GB the editor shows a one-off warning.
The proxies live in your system temp directory under hance-proxy. Your operating system usually clears the temp directory on reboot, but you can remove them at any time:
# macOS / Linuxrm -rf "${TMPDIR:-/tmp}/hance-proxy"
# Windows (PowerShell)Remove-Item -Recurse -Force "$env:TEMP\hance-proxy"
Deleting the cache only removes preview proxies. It never touches your original footage, and the next upload simply rebuilds the proxy it needs.
Looks panel
Section titled “Looks panel”Browse and apply any of the 40+ built-in film stock looks. Click a look to preview it instantly on your footage. Each look shows a thumbnail preview so you can compare at a glance.
Adjustments panel
Section titled “Adjustments panel”Fine-tune every effect parameter with sliders. All the same controls available on the CLI (colour, halation, bloom, grain, vignette, split tone, aberration, and camera shake), grouped into collapsible sections. Color wheels get a dedicated lift/gamma/gain wheel control: pick a tonal zone tab, drag the puck to set the hue and strength, and use the master slider for overall level. A per-tab reset button clears any zone you have moved off neutral.
View modes
Section titled “View modes”Switch between three view modes to evaluate your grade:
- Normal: full-screen preview of the graded result
- Split: side-by-side comparison of the original and graded frames
- Reference: compare against a reference image
Timeline
Section titled “Timeline”For video files, a timeline scrubber lets you navigate through your footage and preview the look at any point. Frame-accurate seeking so you can check how the grade looks across different scenes.
Undo / redo
Section titled “Undo / redo”Full undo/redo history for parameter changes. Experiment freely; you can always step back.
Zoom & pan
Section titled “Zoom & pan”Zoom into your footage to inspect grain, halation, and other fine details at pixel level. Multiple zoom levels available, plus a pan mode for navigating zoomed-in frames.
Save & create looks
Section titled “Save & create looks”Save your current settings as a new .hlook file directly from the UI. Saved looks appear in the looks panel and can be used from the CLI with --preset <name>.
Export
Section titled “Export”Export your graded video or image from the editor. Choose codec, quality, and export preset: the same options available on the CLI.